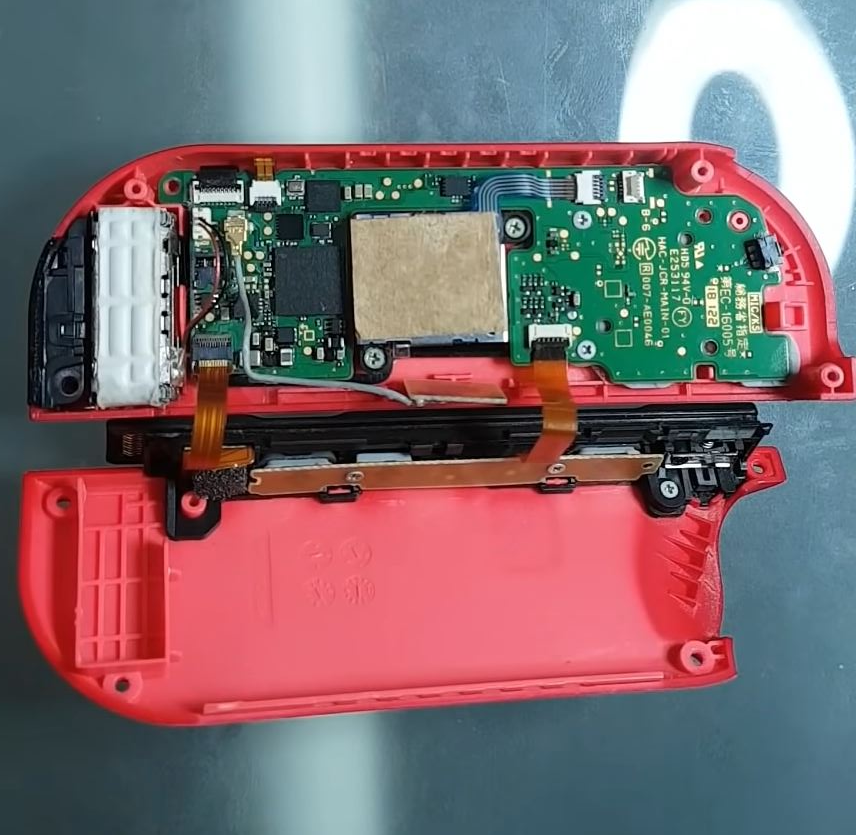
Joy-Con Drift Fix: A DIY Guide
Say goodbye to Joy-Con drift for good! Discover a step-by-step DIY guide to fixing your Joy-Con drift issue today.
Table of Contents
Introduction to Joy-Con Drift
Hey there, young gamers! Have you ever been playing your favorite game on the Nintendo Switch and noticed that your character starts moving on its own? Or perhaps you’re trying to aim at an enemy, but your controller is making it impossible to hit the target? If you’ve experienced these issues, you might be dealing with something called Joy-Con drift.
Joy-Con drift is a common problem that many Nintendo Switch players face. It can be frustrating, especially when it disrupts your gaming experience. But don’t worry, we’re here to help you understand what Joy-Con drift is all about and how you can solve this issue on your own!
When your Joy-Con drifts, it means that the controller’s joystick is registering movements even when you’re not touching it. This can cause your character to move around the screen without you controlling it or can hinder your ability to play games smoothly. If left unaddressed, Joy-Con drift can make gaming less enjoyable, which is the last thing we want!
But fear not, young gamers! With a little know-how and some guidance, you can fix Joy-Con drift and get back to playing your favorite games without any interruptions. Let’s jump right in and learn all about how to tackle this pesky problem!
What Is Joy-Con Drift?
Joy-Con drift is a common problem that Nintendo Switch gamers may encounter while playing their favorite games. It is when the joystick on the Joy-Con controller starts to register movements on its own, even if you’re not touching it. This can be frustrating and affect your gameplay experience.
Signs of Drift
One of the signs to look out for to identify if your Joy-Con is experiencing drift is when your character moves on its own in a game without you touching the joystick. Another sign is when the cursor on the screen drifts without any input from you. These signs indicate that your Joy-Con may be drifting and in need of a fix.
Why Does Drift Happen?
Joy-Con drift can happen due to various reasons. One common cause is the accumulation of dust and debris inside the joystick mechanism, causing it to malfunction. Wear and tear over time can also lead to drift. Understanding why drift happens can help you take better care of your controllers and prevent it from occurring.
Can We Fix Joy-Con Drift Ourselves?
So you may be wondering, can we actually fix Joy-Con drift by ourselves? Let’s dive into this topic and see if it’s possible to tackle this issue at home.
DIY Vs. Professional Help
When it comes to fixing Joy-Con drift, you have two options: doing it yourself or seeking help from a professional repair shop. Let’s weigh the pros and cons of each.
If you decide to take matters into your own hands and attempt a DIY fix, you’ll need to have some basic tools and be comfortable with following instructions carefully. It can be a fun and rewarding experience to learn how to troubleshoot and repair your own devices.
On the other hand, getting professional help can save you time and potentially avoid any accidental damage that might occur during a DIY repair. If you’re not confident in your technical skills or if the drift issue seems complex, seeking the assistance of a repair shop might be the best choice.
Ultimately, the decision between DIY and professional help depends on your comfort level with electronics, the severity of the drift problem, and your willingness to take on the challenge of fixing it yourself.
Gathering the Right Tools
Before you start fixing your Joy-Con drift issue, it’s important to gather all the right tools and items you’ll need for the repair. Here’s a checklist to ensure you’re well-prepared:

Image courtesy of www.notebookcheck.net via Google Images
Tools Needed:
1. Tri-wing screwdriver: This special screwdriver is essential for opening up your Joy-Con without causing any damage.
2. Phillips head screwdriver: You’ll need this to remove the screws inside the Joy-Con once you have it open.
3. Replacement joystick: If the drift problem persists after cleaning and calibrating, you may need to replace the joystick altogether.
4. Tweezers: Handy for removing small components inside the Joy-Con with precision.
Items Needed:
1. Can of compressed air: This will help you blow out any dust or debris that may be causing the drift issue.
2. Cleaning cloth: Use this to gently clean the inside of the Joy-Con to ensure smooth operation.
3. Isopropyl alcohol: Perfect for cleaning electronic components, ensuring a clean connection for your joystick.
By having all these tools and items ready before you start the repair, you’ll be well-equipped to tackle the Joy-Con drift problem with confidence.
Step-by-Step Guide to Fixing Joy-Con Drift
One of the first things you can try to fix Joy-Con drift is calibration. Calibrating your Joy-Con can sometimes reset the internal sensors and fix the drifting issue. To calibrate, go to the settings on your Nintendo Switch, navigate to the Controllers and Sensors section, and select Calibrate Control Sticks. Follow the on-screen instructions to complete the process.
Cleaning
If calibration doesn’t resolve the problem, the next step is to clean the Joy-Con. Dust and debris can build up inside the joystick causing it to drift. To clean your Joy-Con, you can use compressed air to blow out any debris or a small brush to gently remove dirt. Be careful not to damage any internal components while cleaning.
Replacing Components
If calibration and cleaning don’t fix the drift, you may need to replace the joystick component of your Joy-Con. You can purchase replacement joystick parts online or from electronics stores. Follow online tutorials or guides to disassemble your Joy-Con and replace the joystick. Remember to be careful and precise when handling the delicate components.
Testing Your Joy-Con After the Fix
Now that you’ve followed the steps to fix your Joy-Con drift issues, it’s time to test if your Nintendo Switch controller is working properly. Testing your Joy-Con after the repair is crucial to ensure that the problem has been successfully resolved.

Image courtesy of www.ign.com via Google Images
How to Test
To test your Joy-Con, start by connecting it back to your Nintendo Switch console. Turn on the console and navigate to the settings menu. Look for the controller settings and calibrate your Joy-Con to see if the drift issue persists.
Next, try playing a game that requires precise movements, like a racing or platformer game. Move the joystick in all directions to see if the on-screen character responds accurately. Pay close attention to any erratic movements or actions that might indicate the drift problem is still present.
If you notice that the drift issue persists after the repair, you may need to revisit the cleaning or replacement steps to ensure that the Joy-Con is functioning correctly. However, if the controller responds accurately to your movements and there is no sign of drift, congratulations – you have successfully fixed your Joy-Con!
Conclusion: Enjoying Your Repaired Joy-Con
Now that you’ve successfully fixed your Joy-Con and it’s back to working like new, it’s time to enjoy your gaming experience to the fullest. Remember, taking care of your gaming devices is essential to ensure they last a long time and provide you with hours of fun gameplay.
By following the steps outlined in this DIY guide, you’ve not only saved money on repair costs but also gained valuable knowledge about how your Nintendo Switch works. It’s empowering to be able to fix things on your own and understand the inner workings of your gaming controller.
So, grab your newly repaired Joy-Con, get back to gaming, and immerse yourself in the wonderful world of your favorite Nintendo Switch games. Whether you’re exploring new worlds, racing against friends, or battling enemies, your repaired Joy-Con will be your trusty companion on all your gaming adventures.
Generated by Texta.ai Blog Automation

 PlayStation Repair
 Xbox Repair
 Nintendo Repair
 Virtual reality (VR) Repair
 Accessories Repair


