Fix Your PS5 Controller: Step-by-Step

Discover the ultimate guide to fixing your PS5 controller with our step-by-step instructions and expert tips for smooth gaming!
Table of Contents
- Understanding Your PS5 Controller
- Before You Start the Repair
- Troubleshooting the Problem
- Fixing Common Controller Problems
- Disassembling Your PS5 Controller
- Repairing or Replacing Controller Parts
- Reassembling Your PS5 Controller
- Testing Your Repaired PS5 Controller
- Maintenance Tips for Your PS5 Controller
- Conclusion
- FAQs
Welcome, young gamers! Have you ever been in the middle of an exciting game on your PlayStation 5 (PS5) console, only to have your controller stop working properly? It can be frustrating when that happens, but don’t worry – we’re here to help you fix your PS5 DualSense controller step-by-step! This guide is meant to assist you in repairing your PS5 controller if it starts acting up or stops responding as it should. Let’s dive in and get your gaming gear back in top shape!
Understanding Your PS5 Controller
Have you ever wondered how your PS5 controller works? Let’s explore what the PS5 DualSense Controller is and why it might need repairing.
Parts of the PS5 DualSense Controller
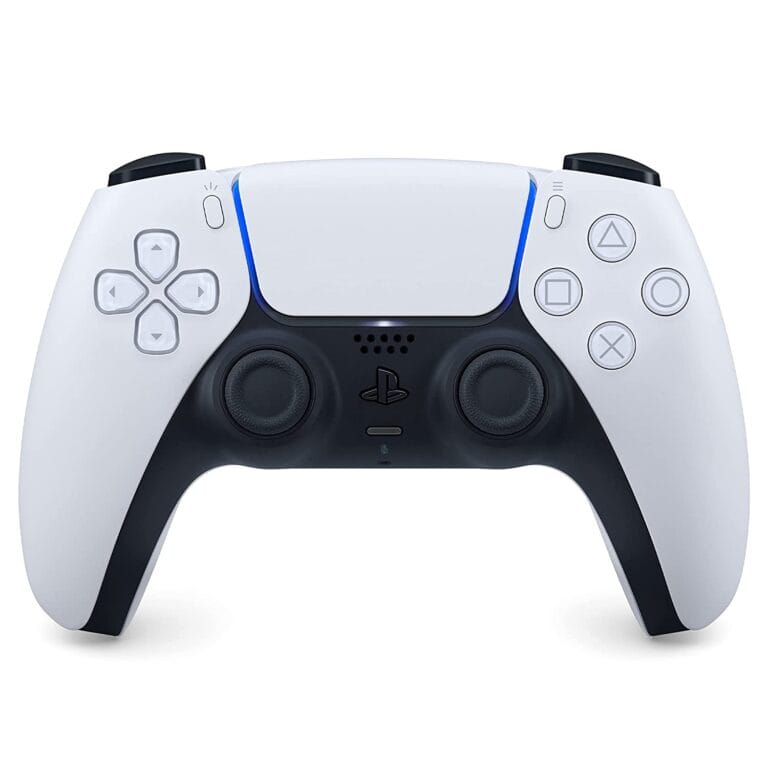
The PS5 controller has many different parts that help you play your favorite games. There are buttons for jumping, shooting, and more. The sticks help you move around in the game, and the touchpad can do cool things like swipe to change settings.
Common Issues with PS5 Controllers
Sometimes, your PS5 controller might have problems like the sticks moving on their own or buttons not working when you press them. These are common issues that can make playing games frustrating. But don’t worry, there are ways to fix them!
Before You Start the Repair
Before diving into fixing your PS5 controller, it’s essential to get prepared. This section will guide you on what you need to do before starting the repair process.
Tools You Will Need
Repairing your PS5 controller will be much more manageable if you have the right tools at hand. Here’s a list of tools you’ll need:
- Screwdriver set (Phillips and Tri-wing)
- Cotton swabs or Q-tips
- Rubbing alcohol or electronic contact cleaner
- Replacement parts, if necessary
Safety Precautions
Safety should always come first when working on electronics. Here are some safety precautions to keep in mind while repairing your PS5 controller:
- Ensure the controller is disconnected from any power source.
- Work in a well-lit and clean area to avoid losing small parts.
- Avoid touching any electronic components with your bare hands to prevent damage from static electricity.
- If you’re unsure about a step, don’t hesitate to ask for help from an adult or someone experienced in electronic repairs.
Troubleshooting the Problem
Before you start fixing your PS5 controller, it’s essential to determine whether the problem lies in the physical components or the software settings. If your controller is not responding at all or has multiple issues across different buttons, it might be a software problem. In such cases, checking the system settings on your PlayStation console can help resolve the issue without having to open up the controller.

Image courtesy of via Google Images
Testing Controller Functions
To pinpoint the specific problem with your PS5 controller, you can start by testing its different functions. Go through each button, joystick, and feature on the controller to see if they are all working correctly. Pay attention to any buttons that are unresponsive, joysticks that drift, or features that don’t function as they should. This testing process will help you identify the exact areas that need fixing.
Fixing Common Controller Problems
When your PS5 controller starts acting up, it can be frustrating. But fear not! Here are some simple fixes for common issues that might arise with your controller.
Drifting Joysticks
If you notice that your joysticks are moving on their own without you touching them, it’s likely they’re experiencing drift. To fix this, try gently cleaning around the base of the joystick with a soft cloth. If that doesn’t work, you may need to replace the joystick module. Don’t worry, it’s easier than it sounds!
Start your Buy, Sell, Repair Game Console. To find your closest store
Unresponsive Buttons
Is your controller not registering button presses? This can be due to dirt or debris under the buttons. Try using a can of compressed air to gently blow away any particles that may be causing the issue. If that doesn’t work, you might need to open up the controller and clean underneath the buttons.
Battery Issues
If you find that your controller’s battery isn’t holding a charge like it used to, it might be time to replace it. Luckily, the battery in the PS5 controller is easily accessible and can be swapped out with a new one. Just make sure to follow the proper steps to avoid damaging any internal components.
Disassembling Your PS5 Controller
Before you can fix your PS5 controller, you’ll need to take it apart carefully. This section will guide you through the process of disassembling the controller step by step.
 Image courtesy of via Google Images
Opening the Controller Case
To begin disassembly, you’ll need to remove the outer casing of the controller. Start by locating the screws that hold the controller together. Use a screwdriver to carefully unscrew them, making sure not to lose any screws in the process. Once the screws are removed, gently pry open the controller case, being cautious not to damage any internal components.
Identifying the Controller Parts Inside
After opening the controller, you’ll see the internal components that make it work. You’ll notice the circuit board, joysticks, buttons, triggers, and other essential parts. Take a moment to familiarize yourself with these components before proceeding with any repairs or replacements. This will help you understand how everything fits together and make it easier to reassemble the controller later on.
Repairing or Replacing Controller Parts
In some cases, simply troubleshooting and cleaning the controller may not be enough to fix the issues you’re facing. If you have identified specific parts of your PS5 DualSense Controller that are broken or malfunctioning, you may need to repair or replace them to restore functionality. Here are some steps to help you with this process:
How to Replace Joystick Modules
If you notice that your controller’s joysticks are not responding accurately or are drifting, you may need to replace the joystick modules. Here’s how you can do it:
1. Purchase a replacement joystick module compatible with your PS5 DualSense Controller.
2. Use a screwdriver to carefully open the controller case and access the joysticks.
3. Disconnect the old joystick module by gently pulling it out of its place.
4. Insert the new joystick module in the correct position, ensuring it is properly aligned.
5. Put the controller back together, making sure all components are securely in place.
6. Test the joysticks to confirm they are functioning correctly.
Fixing Trigger Buttons
If you are experiencing issues with the trigger buttons on your PS5 controller, such as them being stuck or unresponsive, you can attempt to repair them by following these steps:
| Step | Description |
|---|---|
| Step 1 | Reset your controller by inserting a paperclip into the small hole on the back of the controller near the L2 button |
| Step 2 | Clean the joystick by gently blowing air around the base and wiping it with a microfiber cloth |
| Step 3 | Check the battery level of your controller and charge it fully if necessary |
| Step 4 | Update the controller firmware by connecting it to your PS5 via a USB cable and following on-screen prompts |
| Step 5 | Replace the controller battery if it no longer holds a charge |
1. Carefully open the controller case using a screwdriver to access the trigger buttons.
2. Check for any debris or obstructions that may be causing the buttons to stick.
3. Clean the trigger buttons and the surrounding areas with a soft cloth or cotton swab.
4. If there are any visible damages to the buttons, you may need to replace them with new ones.
5. Reassemble the controller, ensuring all parts are correctly placed and secured.
6. Test the trigger buttons to ensure they are now functioning as intended.
By following these steps, you can address specific issues with your PS5 controller’s parts and potentially resolve any functionality problems you may be experiencing.
Reassembling Your PS5 Controller
Now that you have successfully fixed the issues with your PS5 controller, it’s time to put everything back together. Follow these steps to ensure your controller is reassembled correctly.
 Image courtesy of via Google Images
Putting the Parts Back Together
Start by carefully placing the internal components back into the controller casing. Make sure everything fits snugly and aligns properly before proceeding.
Next, gently place the controller’s faceplate back on top, ensuring that all the buttons and joysticks are in their correct positions. Press down evenly to secure the faceplate in place.
Ensuring Everything Works
Before fully snapping the controller back together, perform a quick functionality check. Press each button and move the joysticks to ensure that everything is responding as it should.
If you notice any issues during this check, carefully reopen the controller and double-check the connections of the internal components. Once you are satisfied that everything is working correctly, proceed to snap the controller casing back together.
Your PS5 controller should now be fully reassembled and ready for use. Enjoy gaming with your newly fixed controller!
Testing Your Repaired PS5 Controller
Now that you have successfully repaired your PS5 controller, it’s time to test it to ensure it’s working correctly. Follow these simple steps to make sure your controller is back in top shape:
Step 1: Power On Your PS5
Start by turning on your PS5 console to get ready for testing the repaired controller. Make sure it’s connected properly and ready to pair with your controller.
Step 2: Pair the Controller
Use the USB cable to connect your controller to the console and press the PlayStation button to pair it. Wait for the light bar on the controller to turn a solid color, indicating it’s connected.
Step 3: Test Each Button and Feature
Once the controller is paired, go through each button, joystick, touchpad, and trigger to check if they are working as they should. Press each button and move the joysticks to ensure they are responsive.
Step 4: Check for Drifting Joysticks
If your controller had drifting joysticks before, test them again to see if the issue has been resolved. Move the joysticks in all directions to make sure they are no longer moving on their own.
Step 5: Verify Battery Life
Check the battery life of your controller by monitoring how long it lasts during gameplay. Make sure the battery is holding a charge and not draining quickly.
Step 6: Test Wireless Connectivity
If your controller is a wireless model, test its connectivity by moving around the room while using it. Ensure there are no signal dropouts or delays in response time.
By following these steps and thoroughly testing your repaired PS5 controller, you can be confident that it’s working correctly and ready for more gaming adventures!
Maintenance Tips for Your PS5 Controller
After you’ve fixed your PS5 controller, it’s important to take good care of it to prevent future issues. Here are some simple maintenance tips to keep your controller in top condition.
Regular Cleaning
One key way to maintain your PS5 controller is by regularly cleaning it. Use a soft, dry cloth to gently wipe down the controller’s exterior to remove any dirt or grime that may have accumulated. Avoid using water or harsh chemicals, as these can damage the controller.
Proper Storage
When you’re not using your PS5 controller, it’s essential to store it properly to prevent damage. Keep your controller in a cool, dry place away from direct sunlight and heat. Avoid placing heavy objects on top of the controller or storing it in a cramped space where it could get crushed.
Conclusion
Fixing your PS5 controller doesn’t have to be a daunting task. By following the steps outlined in this guide, you can get your controller back in working order in no time. Remember, taking care of your gaming gear is important to ensure you can continue enjoying your favorite games without any interruptions.
Always be gentle with your controller and follow the instructions provided to avoid causing any additional damage. If you encounter any difficulties during the repair process, don’t hesitate to ask for help from a parent or guardian.
Now that you know how to troubleshoot and fix common issues with your PS5 controller, you can get back to gaming with confidence. So, grab your tools, roll up your sleeves, and get ready to breathe new life into your trusty controller!
FAQs
What if the controller still doesn’t work?
If you’ve followed all the steps and your PS5 controller still isn’t functioning properly, don’t worry! There might be a few more things you can try. First, make sure you’ve correctly reassembled all the parts. Sometimes, a small mistake in putting it back together can cause issues. If everything looks good, you may need to consider seeking help from a professional. PlayStation repair experts can often diagnose and fix more complex problems that you might not be able to handle on your own.
Can I customize my PS5 controller while I repair it?
While repairing your PS5 controller, it’s best to focus on fixing the existing issues before diving into customization. Once you’ve successfully repaired the controller and ensured it’s working correctly, then you can consider customizing it to your liking. There are various options for customizing your controller, such as changing the color of the buttons, adding grip covers for better comfort, or even getting personalized decals. Just remember that customizing your controller won’t affect its functionality, so feel free to let your creativity shine!
Book your Game Console, Controller Repair

Your Repair , Our Concern- Leave your mobile phone number and we will call you back . Consolefixit are experts at fixing game consoles. If your Xbox, PlayStation, or Nintendo is broken and needs repairing, give us a call for a free quote today.

 PlayStation Repair
 Xbox Repair
 Nintendo Repair
 Virtual reality (VR) Repair
 Accessories Repair
 Image courtesy of Sergey Meshkov via


