From here you can book your game console, controller repair with us
Game Console & Controller Repairs
Any PS5 Console, PS5 Controller
Any PS4 Console, PS4 Controller
Any Xbox Series Console, Xbox Series Controller
Any Xbox One Console, Xbox One Controller
Any Nintendo Switch Console, Joy Con Controller
In the world of gaming, the Sony PlayStation 5 stands out as a cutting-edge gaming console that offers an immersive gaming experience. However, like any electronic device, the PS5 may encounter issues over time that require repairs. One common problem that users face is the need for replacing or fixing the console’s panel. In this step-by-step guide, we will walk you through the process of freshening up your PS5 with a new panel.
Common PS5 Panel Issues
The external panel of the PS5 can get damaged due to accidental drops, scratches, or wear and tear. A cracked or damaged panel not only affects the aesthetics of your console but can also impact its functionality. Some common panel issues include cracks, discoloration, loose panels, or scratches that affect the overall look of the PS5.
Start your Buy, Sell, Repair Game Console. To find your closest store
Leave your mobile phone number and we will call you back
Finding the Right Replacement PS5 with a New Panel
Before you start replacing the panel of your PS5, it’s essential to find the right replacement panel that matches the design and specifications of your console. You can purchase replacement panels from authorized Sony retailers, online stores, or specialized gaming console repair shops. Make sure to verify the compatibility of the replacement panel with your specific PS5 model before making a purchase.
Tools Required for Panel Replacement
When it comes to replacing the panel of your PS5, you will need a set of tools to help you dismantle the console and install the new panel. Some essential tools for panel replacement include a screwdriver set (usually Phillips head), a prying tool or plastic opening tool, a soft cloth to clean the console, and a static wrist strap to prevent static discharge while working on the internal components.
Step-by-Step Guide to Replacing the PS5 Panel
Now, let’s dive into the step-by-step process of replacing the panel of your PS5:
Step 1: Power Off and Unplug Your PS5
Before you begin the panel replacement process, ensure that your PS5 is turned off and unplugged from the power source. This step is crucial to prevent any electrical damage or injury during the replacement process.
Step 2: Remove the Side Panels
Using a prying tool or plastic opening tool, gently pry off the side panels of your PS5. Start from the bottom and work your way up, taking care not to force the panels off. Set the side panels aside in a safe place for reassembly later.
Step 3: Unscrew the Screws Holding the Panel
Locate the screws that are holding the damaged panel in place. Using a Phillips head screwdriver, carefully unscrew and remove the screws. Keep track of the screws to ensure you can reattach the new panel securely.
Freshen Up Your PS5 with a New Panel: A Step-by-Step Guide!
Step
Description
1
Turn off your PS5 and unplug all cables.
2
Use a screwdriver to remove the screws on the back panel.
3
Gently detach the old panel from the PS5.
4
Line up the new panel with the PS5 and secure it in place.
5
Replace the screws on the back panel.
6
Plug in all cables and turn on your newly refreshed PS5!
Step 4: Replace the Panel with the New One
Gently remove the damaged panel and replace it with the new one. Align the screw holes on the new panel with the holes on the PS5 chassis and carefully screw them back into place. Ensure the panel is snug and securely attached to the console.
Step 5: Reattach the Side Panels
Once the new panel is securely in place, reattach the side panels by lining them up with the PS5 chassis and gently pressing them into place. Make sure they are flush with the console to maintain the aesthetic appeal of your PS5.
Step 6: Power On Your PS5 and Test
After replacing the panel, power on your PS5 and test it to ensure that the new panel is functioning correctly. Check for any loose connections, gaps, or misalignments that may require readjustment.
Conclusion
Freshening up your PS5 with a new panel can breathe new life into your gaming experience and restore the sleek look of your console. By following this step-by-step guide and taking the necessary precautions, you can easily replace the panel of your PS5 and enjoy a refreshed gaming setup. Remember to handle your console with care and consult professional repair services for complex panel replacements.
FAQ
Can I replace the panel of my PS5 on my own?
Yes, you can replace the panel of your PS5 on your own by following our step-by-step guide. Just make sure to have the necessary tools and take necessary precautions.
Where can I find replacement panels for my PS5?
You can find replacement panels for your PS5 at authorized Sony retailers, online stores, or specialized gaming console repair shops. Make sure to verify the compatibility before purchasing.
Do I need special tools to replace the PS5 panel?
Yes, you will need basic tools such as a screwdriver set, prying tool, soft cloth, and static wrist strap to safely replace the panel of your PS5.
How long does it take to replace the panel of a PS5?
Replacing the panel of a PS5 can take around 30-60 minutes, depending on your familiarity with the process. Take your time and follow the steps outlined in our guide for a smooth replacement experience.

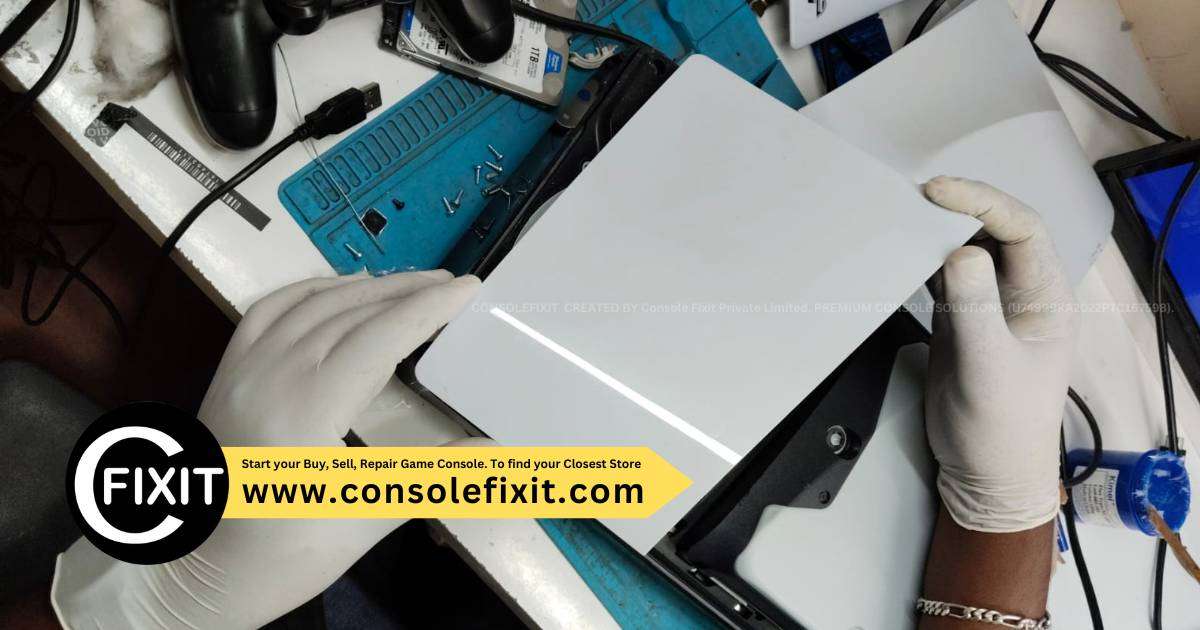
 Image courtesy of d30visuals . via


 PlayStation Repair
 Xbox Repair
 Nintendo Repair
 Virtual reality (VR) Repair
 Accessories Repair